#HPC testing
Explore tagged Tumblr posts
Visit Tumblr Blog
Explore Tumblr blogs with no restrictions, modern design and the best experience.
Last Seen Tumblr Blogs


Fun Fact
BuzzFeed published a report claiming that Tumblr was utilized as a distribution channel for Russian agents to influence American voting habits during the 2016 presidential election in Feb 2018.
Text
The QUANTUM WR-5246-40: A NeW HPC Test Chambers

AES, a leading environmental test chamber manufacturer, introduces the QUANTUM WR-5246-40, a cutting-edge walk-in test chamber for data centre component testing and high-performance computing.
As business relies more on HPC systems for AI, machine learning, and large-scale simulations, it has never been more important to ensure their reliability in hostile climates. The QUANTUM WR-5246-40 pushes thermal testing with a 250kW live load testing capabilities. This chamber was collaboratively designed and standardised with one of the top three HPC leaders to fulfil server rack testing requirements after several deployments, comprehensive field testing, and important field service team feedback.
Extreme HPC Testing Performance
The QUANTUM WR-5246-40 simulates data centre conditions. This chamber supports GPU, CPU, ASIC, and other high-power electronics testing. Notable traits include:
Floorless design allows two full server racks to be easily wheeled in and out.
Precision Airflow Control: Data centre airflow maximises static pressure to evaluate cooling.
Fast temperature cycling and high-power load capacity: Accurate performance assessment for demanding workloads in hot settings.
Customised Solutions: It chambers can contain full-scale server racks and cooling systems and fulfil AI hardware manufacturers' testing requirements.
Large multi-pane viewing windows with LED DUT monitoring illumination improve visibility and safety. handle for operator safety within emergency egress.
Large-Scale Deployments: AES designs and implements large-scale HPC lab layouts to optimise testing conditions and efficiency. Consider equipment flow, placement, and data collection.
Server Rack Reliability Testing Future
AES CEO Michael Shirley said, “At AES, it recognised the evolving needs of AI-driven infrastructure and high-performance computing.” The collaborative process is shown by the QUANTUM WR-5246-40, a reliable HPC industrial solution. This product launch is great for AES as it expands and adds products. It also involves moving into a larger industrial location that will quadruple capacity and promote innovation and expansion.
To meet top industry expectations, AES has created innovative environmental test solutions. The QUANTUM WR-5246-40 continues that legacy by offering a premier high-power electronics testing platform.
QUANTUM-WR-5246-40
The QUANTUM Series WR-5246-40 is a high-performance version of AES's popular floor-style devices designed for modern server testing. This chamber, designed with help from a major manufacturer, improves cooling efficiency, airflow control, and durability and use.
STRUCTURE
Our robust and simple-to-use QUANTUM WR floorless design makes wheeling server racks in and out for testing straightforward. #4 finish Interior corrosion resistance, durability, and cleanliness are guaranteed with 304 stainless steel. Large multi-pane windows and LED lights reveal the DUT. An interior emergency exit handle allows for quick escape in an emergency.
The inside workstation is lined with type 304 stainless steel for vaportightness. The ramp on the heated low-profile floor makes two computer/server racks easy to move into the workstation. Between the layers is low-k, high-efficiency thermal insulation.
PERFORMANCE
Server testing requires front-to-back airflow, which this chamber provides. Static pressure's precise management with the changing airflow system lets engineers evaluate its impact on systems. Parallel coils offer more equal cooling, ensuring consistent workstation conditions. Air driers reduce chamber moisture and increase uptime, making them suitable for testing fragile electronics. Chamber's variable frequency drive (VFD) adjusts fan speed to manage airflow. Large hot access ports allow DUT interaction without peripherals.
Three centrally located, equally spaced cable access ports are on each side. Left and right side walls have six-inch ports.
Cooling/heating
To provide accurate temperature management within ±0.5°C, QUANTUM WR test chambers have open multiple nichrome heaters on both sides.Nichrome heaters on both sides of the QUANTUM WR test chamber ensure precise temperature management within ±0.5°C. The cooling system includes a cascade mechanical refrigeration system and a water-cooled condenser. Increase cooling using liquid LN2 or CO2 for faster pull-down speeds during stress testing. Basic cascade refrigeration systems from AES have the quickest change rates in the industry without boost cooling.
INSTRUMENTATION
The QUANTUM WR Series Test Chambers use AESONE CONNECT, a dependable linked device with a standard interface, to simplify operation and test monitoring.
#technology#technews#govindhtech#news#technologynews#QUANTUM WR-5246-40#QUANTUM WR#QUANTUM#QUANTUM Series#QUANTUM WR Series#HPC testing
0 notes
Note
So leftists are people that worship the fact that they are on the left and treat opponents as enemies but there are also people on the left who are just on the left without being leftists. Does that also apply to people on the right or are they generally less tribalistic and more rational in their politics?
No. They have them on the right. But we can them Neo Cons. Though realistically they could be called Hyper Puritan Conservatives. HPC. But the name isn't catchy and wouldn't stick. However, having said that most conservatives in general are more libertarian and as such are less tribal. That's not to say there's not several cases of "conservatives" that are authoritarian tribalists. Because there are. But the difference is probably more related to the sheer level of purity testing you see between the far left and far right.
5 notes
·
View notes
Text
So I guess I'm the type of person who has a "spare" Airbrush now?
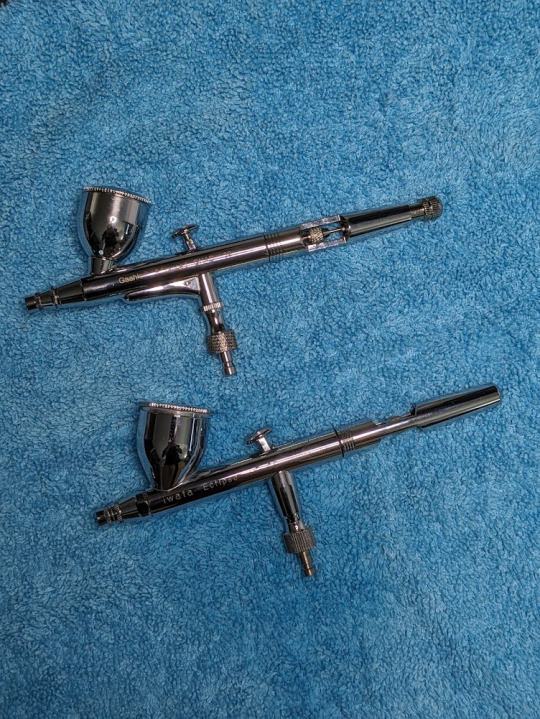
TLDR If you want to try airbrushing but are intimidated by the price of the bigger name brands like Iwata or Harder and Steenbeck, maybe give Gaahleri a look.
So I have had my Iwata Eclipse HPCS for about 18 months now and I love it, it has handled pretty much everything I could throw at it until I tried using Mission Models Paint on my most recent build. They are a waterbased acrylic and I had no trouble with Vallejo, Citadel, Army painter and Pro-Acryl (Easily my favourite water based paint), but MMP does not thin the way I have any other paint, they recommend no more than 20% (5:1 paint to thinner) and it is just so thick (and that's before adding their poly additive).
I persevered and got through the project, but not without continually having to clear clogs and dry tips. I had been wondering if getting a .5mm needle/nozzle for the eclipse might be worth a try but figured I'd wait until my next project to experiment.
Flash forward about a month and I've been seeing Gaahleri airbrushes promoted eeeeeevry where and they were cheap not actually that much more than getting a new needle kit $40 for everything I would need to change vs $45 for the Gaahleri kit with both a .35 and .5 needle. So I decided I'd grab one to try out, well prime day comes around and they had it on sale for $35 so that was an instant buy.
It arrived last week and I had a chance to test it out today and first things first, if you have used a higher end brush, you can feel the difference right away, the fit and finish is just not quite there, threads are rough the trigger is stiff and sticks a little at the end, even after lubing it. I had seen others mentioned that the pre-installed .35 needle was kind of jammed in when they got theirs and while mine wasn't bad, it definitely felt like everything was a little over tightened.
The thing is though for $45 or less, I really can't complain. It's a little heavier than my Iwata, but not in a way that seems like a problem and honestly you might prefer a little extra chonk. The .35 needle performed just fine, I got paint on plastic without too much trouble and had the same issues with the gloopy Mission Models Paints. Then I cleaned up and switched over to the .5 needle and I was able to just hose a bunch of spoons down with their primer without a second though, the tip did not dry out and the brush did not clog once during the entire process. I tried their top coats, their flat coat is garbage and it was still garbage through the .5 needle, but the gloss was fantastic.
Cleaning was pretty much the same as my other brush, except for the removable cup, which I thought would be a nice feature, but honestly the number of times I started to loosen it while cleaning the cup during a paint swap did get a little annoying YMMV if your used to a removable cup, im sure its not that bad.
Overall I'm pretty happy with my purchase as it was less than the cost of the alternate parts for my Iwata and now I don't have to swap everything over when I want to use a different needle, I can just grab the brush that has the one I want.
5 notes
·
View notes
Text
here’s some gender neutral period care brands that I highly recommend!
1. somedays.
this is the brand that got me started on my period pain healing journey!! now it’s a little pricy at first, but one thing I love about their products is that they are made to last you months to years. I invested in their “better cycle kit” in 2022 (before they came out with the newest version of their belly jelly) and I have never experienced better long-term relief. the better cycle kit is designed for those of us with severe pain, and by god it works! and spending $117 dollars once has been well worth it, and I have absolutely no regrets.
2. the honeypot company
I am skeptical of any company that advertises products designed to “balance your ph” or “cleanse your vagina” because summer’s eve and vagisil do quite the opposite, while promising the same thing. while I haven’t tried any of HPC’s internal products (suppositories, etc), their products for sensitive/itchy vulvas have been a godsend. no artificial colors or scents, and the goal is not to get your vulva smelling like a pack of skittles.
their pads are also excellent! super soft, no dyes, and I haven’t had a leak yet. I will say that I’ve only tried their non-infused pads, as they do offer some infused with aloe and other soothing agents.
3. august
I’ll be real, I haven’t bought from august yet. HOWEVER, their social media game is fire. and if I ever live somewhere they deliver, I would love to make a custom box for myself! I hate investing in a whole box of tampons, knowing I only use them to swim, maybe once every other month. they allow you to build your own box of tampons/pads/liners, in accordance with how much you need.
not to mention their wrappers are water-soluble, and they’re super transparent about the creation process. I can’t wait for my next period (/j) just so I can test out their products!
anyways, that’s my little recommendation for my total of 4 followers lol
3 notes
·
View notes
Text
Top Services Offered by Microbiological Testing Labs in Abu Dhabi: A Complete Guide | +971 554747210
In today’s fast-evolving industrial landscape, the demand for quality, safety, and regulatory compliance is higher than ever. For sectors like food and beverage, pharmaceuticals, cosmetics, water treatment, and healthcare, ensuring microbiological safety is a top priority. This is where a microbiological testing lab in Abu Dhabi plays a crucial role.
Abu Dhabi, the capital of the UAE, has positioned itself as a center of scientific innovation and stringent quality control. Accredited microbiological labs across the emirate offer a comprehensive suite of services that help businesses meet both local and international regulatory standards.
In this complete guide, we explore the top services offered by microbiological testing labs in Abu Dhabi and how they support safety, compliance, and consumer trust.
What Is a Microbiological Testing Lab?
A microbiological testing lab is a specialized facility that conducts detailed analyses to detect, identify, and quantify microorganisms like bacteria, viruses, yeasts, and molds in a variety of products and environments. These labs help prevent contamination, safeguard health, and ensure that products are safe for consumption, use, or distribution.
1. Food Microbiological Testing
Food safety is one of the most regulated and critical sectors in Abu Dhabi. Microbiological testing labs provide thorough assessments of food and beverage products to detect harmful pathogens and spoilage organisms.
Common tests include:
Pathogen detection: Salmonella, E. coli, Listeria monocytogenes, Staphylococcus aureus
Indicator organisms: Total viable counts (TVC), total coliforms, and fecal coliforms
Spoilage organisms: Yeasts and molds
Shelf-life testing: Evaluating microbial stability over time
These tests help food producers comply with UAE.S standards, Dubai Municipality regulations, GSO guidelines, and international export standards.
2. Pharmaceutical Microbiology
Pharmaceutical products must be free from microbial contamination to ensure patient safety. Abu Dhabi’s microbiological testing labs support pharmaceutical manufacturers in maintaining high purity standards through a range of validated testing methods.
Services typically include:
Sterility testing: For injectable drugs and sterile products
Microbial limit tests: For tablets, syrups, ointments, and capsules
Bioburden testing: For manufacturing equipment and raw materials
Endotoxin testing: Especially for parenteral drugs and medical devices
Environmental monitoring: Air quality, surface swabs, and personnel hygiene in cleanrooms
These services are critical for GMP (Good Manufacturing Practice) compliance and are aligned with USP, BP, and Ph. Eur. pharmacopeial standards.
3. Cosmetic and Personal Care Testing
Cosmetic products can also harbor microbial contaminants that cause skin infections or product degradation. Microbiological testing labs in Abu Dhabi help manufacturers ensure the safety of creams, lotions, shampoos, and serums.
Testing services include:
Total viable count (TVC) of bacteria and fungi
Preservative efficacy testing (PET): To verify that the product's preservative system prevents microbial growth
Pathogen-specific tests: For Pseudomonas aeruginosa, Candida albicans, Staphylococcus aureus
These tests ensure compliance with ISO 17516 and UAE.S 2077 cosmetic safety standards.
4. Water Testing and Potability Analysis
Water quality is vital for public health, industrial use, and consumer safety. Whether it’s bottled drinking water, swimming pool water, or water used in food manufacturing, testing for microbial contamination is essential.
Labs offer:
Testing for coliforms and E. coli
Heterotrophic plate count (HPC)
Legionella detection
Pseudomonas aeruginosa testing
Microbiological analysis of seawater and processed water
Labs in Abu Dhabi follow WHO guidelines, UAE.S 149, and ADQCC regulations to ensure water quality compliance.
5. Environmental Monitoring Services
Microbial contamination in production environments can compromise entire batches of products. Microbiological testing labs in Abu Dhabi provide environmental monitoring services that ensure hygiene in:
Food processing units
Pharmaceutical cleanrooms
Cosmetic production lines
Hospital and clinic environments
Services include:
Air sampling
Surface swabbing
Contact plate testing
Hand hygiene swabbing for personnel
These services are vital for preventive maintenance and ongoing quality assurance.
6. Pathogen Identification and Strain Typing
For companies dealing with contamination events, it’s essential to identify the exact microorganism responsible. Advanced microbiological labs in Abu Dhabi use molecular biology techniques such as:
PCR (Polymerase Chain Reaction)
16S rRNA sequencing
Genotyping and strain differentiation
These methods support root cause analysis and allow manufacturers to trace contamination sources, implement corrective actions, and avoid recurrence.
7. Antimicrobial Efficacy Testing
Some products, especially disinfectants, antiseptics, and sanitizers, must be proven effective against bacteria and viruses. Microbiological testing labs offer:
Minimum Inhibitory Concentration (MIC)
Time-kill studies
Zone of inhibition (agar diffusion)
Viral inactivation studies
These tests help companies validate their product claims and ensure that they are effective in real-world conditions.
8. Rapid Microbiological Methods (RMM)
To meet urgent deadlines and real-time decision-making, many labs in Abu Dhabi now offer rapid testing solutions using automated systems and biosensors. Benefits include:
Results in hours instead of days
Improved process control
Faster batch release
Technologies like ATP bioluminescence, qPCR, and ELISA are commonly used in these rapid platforms.
9. Training and Consultancy Services
Top microbiological labs don’t just provide testing—they also offer guidance and consultancy services to manufacturers, including:
Regulatory compliance training
HACCP plan development
GMP and hygiene audits
Crisis management for contamination outbreaks
These services help clients stay ahead of potential compliance issues.
10. Sample Collection and Logistics
To simplify the process for manufacturers, many labs offer on-site sample collection and secure logistics services. This ensures:
Proper sampling techniques
Cold chain integrity
Timely delivery of samples to the lab
Chain-of-custody documentation for regulatory audits
Why Choose a Microbiological Testing Lab in Abu Dhabi?
Abu Dhabi’s testing labs are known for their:
ISO/IEC 17025 accreditation
Highly qualified microbiologists and technicians
State-of-the-art equipment
Compliance with UAE and international standards
Collaboration with government bodies like ADQCC, MOIAT, and Dubai Municipality
By partnering with a reliable microbiological testing lab in Abu Dhabi, manufacturers can strengthen product safety, build trust with consumers, and meet stringent regulatory demands locally and globally.
Final Thoughts
In a world where quality and safety define brand value and business success, microbiological testing labs in Abu Dhabi play a central role in ensuring compliance, trust, and market competitiveness. From food safety and pharmaceutical quality to cosmetics and water purity, these labs deliver the scientific insights and data that manufacturers need to thrive in regulated environments.
0 notes
Link
#commercialpilots#energyoptimization#GCC-Israeltechaccord#HybridAlgorithms#post-quantumcryptography#QuantumComputing#quantumtalentdevelopment#smartinfrastructure
0 notes
Text
Accelerate Engineering Performance with NX CAE: Comprehensive Simulation for Better Design Decisions
In today's fast-paced product development environment, simulation has become a critical part of engineering. Engineers are no longer relying solely on physical prototypes—they're making smarter, faster decisions using advanced Computer-Aided Engineering (CAE) tools. NX CAE by Siemens is a powerful, integrated simulation solution that helps engineers predict real-world behavior of products with high accuracy. As an official Siemens partner, DDSPLM brings you NX CAE with expert implementation, customization, and training to unlock its full potential in your organization.
What is NX CAE?
NX CAE (Computer-Aided Engineering) is a simulation-driven design environment that integrates seamlessly with NX CAD. It empowers engineers and analysts to simulate structural, thermal, flow, motion, acoustic, and multiphysics problems—all within a unified environment. From concept design to final validation, NX CAE helps reduce the cost, time, and complexity of product development. Whether you are in automotive, aerospace, industrial machinery, or consumer goods, NX CAE provides the simulation power and flexibility needed to innovate faster and smarter.
Key Features of NX CAE
Integrated Simulation Platform
Multiphysics Analysis
Automated Meshing & Advanced Solver Integration
Simcenter Integration
Design-Integrated Simulation
High-Performance Computing (HPC)
Results Visualization
Benefits of Using NX CAE
Reduce physical prototyping costs
Accelerate product development cycles
Improve simulation accuracy and reliability
Eliminate data translation errors between CAD and CAE
Make design decisions early with real-time feedback
Increase cross-team collaboration
Minimize product failure and warranty issues
Why Choose DDSPLM?
At DDSPLM, we don’t just sell software — we empower engineering innovation. As a trusted Siemens Digital Industries Software partner, DDSPLM offers:
Expert Consultation – Guidance on choosing and implementing the right CAE solution
Domain Expertise – Decades of experience across various industries
Training & Support – Ongoing training programs and responsive technical support
End-to-End Solutions – From licensing to deployment and integration with PLM systems
Conclusion:-
Simulation isn’t just about testing – it’s about discovering better ways to innovate. With NX CAE, you unlock the ability to simulate, validate, and optimize your designs early in the product development cycle, ensuring better quality and faster time to market. Combined with DDSPLM’s industry-leading support and deep expertise, your engineering teams are equipped to transform ideas into reality with speed and precision.

0 notes
Text
VPS GPU là gì? Giải pháp mạnh mẽ cho nhu cầu tính toán chuyên sâu
Trong thời đại công nghệ số phát triển mạnh mẽ, nhu cầu xử lý các tác vụ nặng như render video, AI, deep learning, hoặc đào tạo mô hình học máy ngày càng gia tăng. Các tác vụ này đòi hỏi khả năng tính toán mạnh mẽ mà các loại VPS thông thường khó đáp ứng. Đây chính là lúc VPS GPU trở thành giải pháp tối ưu.
VPS GPU là gì?
VPS GPU (Virtual Private Server with Graphics Processing Unit) là một máy chủ ảo có tích hợp GPU chuyên dụng. Khác với VPS truyền thống chỉ sử dụng CPU cho xử lý, VPS GPU được trang bị thêm card đồ họa rời (GPU) để thực hiện các tác vụ đòi hỏi khả năng xử lý song song và đồ họa cao.
GPU có khả năng xử lý đồng thời hàng nghìn luồng dữ liệu, phù hợp với các công việc như:
Đào tạo mô hình AI, machine learning, deep learning
Render video, dựng phim, thiết kế đồ họa 3D
Chạy mô phỏng vật lý, tài chính
Khai thác tiền điện tử (crypto mining)
Lợi ích khi sử dụng VPS GPU
Hiệu suất vượt trội
Nhờ có GPU, VPS GPU giúp tăng hiệu suất xử lý gấp nhiều lần so với VPS truyền thống. Các tác vụ render video hay huấn luyện mô hình AI được xử lý nhanh chóng, tiết kiệm thời gian và chi phí.
Linh hoạt và mở rộng dễ dàng
Người dùng có thể dễ dàng nâng cấp cấu hình GPU theo nhu cầu sử dụng mà không cần thay đổi hạ tầng vật lý. Đây là ưu điểm nổi bật so với việc đầu tư máy chủ vật lý.
Tiết kiệm chi phí đầu tư
Việc sở hữu một máy trạm GPU chuyên dụng có thể tốn hàng chục đến hàng trăm triệu đồng. Trong khi đó, thuê VPS GPU theo tháng hoặc theo giờ sẽ tiết kiệm hơn nhiều mà vẫn đảm bảo hiệu năng.
Khả năng truy cập từ xa
Bạn có thể truy cập và làm việc với VPS GPU từ bất kỳ đâu, miễn có kết nối internet. Điều này rất phù hợp cho freelancer, nhóm phát triển phần mềm hoặc các dự án cộng tác từ xa.
Những ai nên sử dụng VPS GPU?
Lập trình viên AI, machine learning
Việc đào tạo mô hình học máy với lượng dữ liệu lớn rất cần GPU để tăng tốc. VPS GPU giúp các lập trình viên rút ngắn thời gian huấn luyện và thử nghiệm mô hình.
Nhà thiết kế đồ họa, dựng phim
Dựng video 4K, xử lý hiệu ứng phức tạp hay dựng mô hình 3D đều cần GPU mạnh. VPS GPU có thể hỗ trợ phần mềm như Blender, Adobe After Effects, DaVinci Resolve, v.v.
Game developer và streamer
Các nhà phát triển game cần môi trường có GPU để test hiệu năng hoặc render nhân vật, môi trường game. Ngoài ra, các streamer có thể dùng VPS GPU để encode và stream chất lượng cao.
Các tổ chức tài chính, nghiên cứu
Các tác vụ mô phỏng thị trường, mô hình rủi ro, hay nghiên cứu khoa học đều đòi hỏi xử lý tính toán cao. VPS GPU là giải pháp hiệu quả để chạy các mô phỏng lớn.
Những lưu ý khi chọn mua VPS GPU
Kiểm tra loại GPU
Không phải GPU nào cũng phù hợp cho mọi nhu cầu. Ví dụ:
NVIDIA Tesla, A100, V100: chuyên cho AI, HPC, deep learning
NVIDIA RTX 3090, 4090: phù hợp render, gaming, dựng phim
AMD Radeon: giá rẻ, dùng cho đồ họa cơ bản
Hãy chọn loại GPU phù hợp với mục đích sử dụng của bạn.
RAM và CPU đi kèm
GPU mạnh cần kết hợp với CPU và RAM đủ tốt để tránh tình trạng "thắt cổ chai". Hãy kiểm tra kỹ cấu hình tổng thể của VPS, không chỉ riêng GPU.
Dung lượng lưu trữ và tốc độ I/O
Nếu làm việc với file video, mô hình AI lớn, bạn cần dung lượng ổ đĩa cao và tốc độ đọc/ghi tốt, ưu tiên ổ SSD NVMe.
Hỗ trợ driver và phần mềm
Đảm bảo nhà cung cấp hỗ trợ cài đặt driver GPU đúng phiên bản, có thể cài CUDA, cuDNN hoặc các framework như TensorFlow, PyTorch...
Nhà cung cấp VPS GPU uy tín
Hiện nay có nhiều đơn vị trong và ngoài nước cung cấp dịch vụ VPS GPU. Một số tên tuổi nổi bật:
AWS EC2 (Amazon) – Hạ tầng mạnh, nhiều lựa chọn GPU nhưng chi phí cao
Google Cloud GPU – Dễ dùng, tích hợp nhiều công cụ AI
Azure NV Series – Tối ưu cho xử lý đồ họa, học máy
Vultr, Linode – Giá hợp lý, hỗ trợ GPU phổ thông
Nhà cung cấp trong nước – Một số đơn vị như Viettel IDC, BizFly Cloud, AZDIGI... cũng bắt đầu triển khai dịch vụ VPS GPU
Kết luận
VPS GPU đang trở thành giải pháp lý tưởng cho những ai cần hiệu năng xử lý cao mà không muốn đầu tư phần cứng đắt tiền. Từ các lập trình viên AI đến nhà làm phim, từ nhà nghiên cứu đến streamer, tất cả đều có thể tận dụng lợi thế mà VPS GPU mang lại.
Nếu bạn đang tìm kiếm một môi trường làm việc mạnh mẽ, linh hoạt, truy cập mọi nơi và chi phí tối ưu, VPS GPU chính là lựa chọn đáng để cân nhắc.
Thông tin chi tiết: https://vndata.vn/vps-gpu/
0 notes
Text
NVIDIA Grace CPU C1 Arm Processor For The Data Center

NVIDIA Grace CPU C1 Arm Processor For The Data Center
Grace CPU C1
NVIDIA's Grace CPU C1 is revolutionising data centres and edge computing with its speed and energy efficiency. The NVIDIA Grace CPU C1 excels at AI, HPC, and data-intensive operations using Arm's Neoverse V2 architecture.
Architecture
Arm Neoverse V2 processor with 72 cores.
Each core contains four 128-bit Scalable Vector Extensions 2 (SVE2) units for vector processing.
TSMC's 4N (4nm) proprietary manufacturing node was used for fabrication.
Interconnect: NVIDIA Scalable Coherency Fabric (SCF) provides 3.2 TB/s bisection bandwidth for fast memory, I/O, and CPU core data flow.
Memory Architecture: Supports 480 GB of LPDDR5X ECC memory at 500 GB/s.
The large 117 MB combined L3 cache reduces memory latency for compute-intensive workloads.
Performance
Real-world workload gains:
Up to 2.3x faster in microservices.
Two times faster for memory-intensive data processing
Computational fluid dynamics can be 1.9x faster.
STREAM Triad Efficiency: Over 90% core utilisation shows high memory throughput and parallel computation.
Power Efficiency: LPDDR5X memory and optimised Arm cores provide it competitive or better performance than top x86 CPUs at reduced power consumption.
Features
High computing density of the next-generation Neoverse V2 inspired Arm-Based 72 Cores.
LPDDR5X ECC Memory: The first server-class CPU with ECC memory and low power consumption and high bandwidth.
Energy-Efficient Design: Uses a fraction of DDR5 memory power for data centres with tight power and cooling constraints.
SCF allows high-bandwidth die communication.
CUDA, HPC SDK, and AI frameworks are NVIDIA Software Stack-compatible.
Secure boot, ECC memory, and Arm system-level security.
Gaming
The NVIDIA Grace CPU C1 is for data centres, edge computing, HPC, and AI inference, not gaming. Current models lack integrated graphics and a GPU for gaming.
Grace can be used in cloud gaming servers, especially when combined with NVIDIA GPUs like L4 or Hopper for rendering. This is server work, not local gameplay.
Advantages
High Energy Efficiency: LPDDR5X uses less power than DDR5 while improving bandwidth.
Optimal memory bandwidth for scientific applications and simulations is 500 GB/s.
SCF ensures low latency and core-wide performance.
Dense Performance: Cloud-native, virtualisation, and AI inference benefit from 72-core computer density.
For AI-heavy applications, it seamlessly connects with Grace Hopper (Grace CPU + Hopper GPU) via NVLink-C2C.
Arm Architecture: Scalable and possibly more secure than x86 for specific applications.
Disadvantages
Non-x86 compatible: Not suited for x86 programs or enterprise workloads.
Not Customer-focused: No desktop-class graphics or gaming support.
It often works with other NVIDIA components like GPUs and SmartNICs for best performance.
Availability Constraints: Small firms and system builders cannot easily access this sophisticated component.
Most general-purpose computing benchmarks originate from NVIDIA; there was minimal independent testing at introduction.
Summary
The data center-focused, energy-efficient, and AI-optimized NVIDIA Grace CPU C1 uses Arm's latest server architecture. It excels in scalable and memory-intensive computation with industry-leading bandwidth and power efficiency. It's not built for gaming or consumer computing, and its software compatibility with non-NVIDIA products may hinder adoption.
#NVIDIA Grace CPU C1#NVIDIA Grace CPU C1 Price#Grace CPU C1#CPU C1#Grace Hopper#NVIDIA Grace CPU#technology#technews#govindhtech#news#technologynews
0 notes
Text
Revolutionizing AI Development with Affordable GPU Cloud Pricing and Flexible Cloud GPU Rental Options

In today’s data-driven world, the demand for high-performance computing is growing at an unprecedented pace. Whether you’re training deep learning models or running complex simulations, access to powerful GPUs can make all the difference. Fortunately, modern platforms now offer cost-effective GPU cloud pricing and flexible cloud GPU rental services, making cutting-edge computing accessible to everyone, from startups to research institutions.
Why Affordable GPU Cloud Pricing Matters
Efficient GPU cloud pricing ensures that businesses and developers can scale their operations without incurring massive infrastructure costs. The ability to access high-end GPUs on a pay-as-you-go model is especially beneficial for AI workloads that require intensive computation.
Budget-Friendly Rates: Platforms are now offering some of the most competitive pricing models in the industry, with hourly rates significantly lower than traditional hyperscalers.
No Hidden Fees: Transparent pricing with no data transfer charges allows users to control their budget while maximizing performance fully.
Diverse GPU Options: From advanced NVIDIA A100s to AMD's latest offerings, users can choose from various GPUs to meet their unique workload requirements.
Cloud GPU Rental: The Key to Flexibility
Cloud GPU rental empowers users to access the right hardware at the right time. This flexibility is ideal for project-based work, startups testing AI models, or research teams running simulations.
On-Demand Access: Users can rent GPUs exactly when they need them—scaling up or down depending on their workflow.
Scalable Solutions: From single-user tasks to enterprise-level needs, modern platforms accommodate all scales of usage with ease.
Secure and Reliable: Enterprise-grade infrastructure housed in Tier III and IV data centers ensures minimal downtime and maximum performance.
Cost-Effective Performance at Your Fingertips
One of the biggest advantages of cloud GPU rental is the massive cost savings. Modern providers offer rates up to 50% lower than traditional cloud platforms, making them an ideal choice for budget-conscious teams.
All-Inclusive Pricing: What you see is what you pay—no extra charges for data transfer or system maintenance.
Tailored for AI & HPC: These platforms are built from the ground up with AI, deep learning, and HPC needs in mind, ensuring high-speed, low-latency performance.
Custom Discounts: Users with long-term needs or bulk usage requirements can take advantage of volume discounts and custom plans.
Designed for Developers and Innovators
Whether you’re building the next breakthrough AI application or analyzing large-scale scientific data, cloud GPU rental services offer the tools you need without the overhead.
Virtual Server Configuration: Customize your virtual environment to fit your project, improving efficiency and cutting waste.
Integrated Cloud Storage: Reliable and scalable cloud storage ensures your data is always accessible, secure, and easy to manage.
Final Thoughts
The landscape of high-performance computing is changing rapidly, and access to affordable GPU cloud pricing and flexible cloud GPU rental is at the heart of this transformation. Developers, researchers, and enterprises now have the freedom to innovate without being held back by hardware limitations or financial constraints. By choosing a provider that prioritizes performance, transparency, and flexibility, you can stay ahead in a competitive digital world.
#GPUCloudPricing#CloudGPURental#AIComputing#MachineLearningTools#DeepLearningHardware#FlexibleCloudGPU#AffordableAI
0 notes
Text
Come installare e configurare una GPU Nvidia Tesla su Windows

Le GPU Nvidia Tesla sono progettate per prestazioni di calcolo elevatissime e sono ampiamente utilizzate in ambiti come l'Intelligenza Artificiale, il Machine Learning e le applicazioni professionali di grafica. Che tu stia configurando una workstation di sviluppo o un server di elaborazione oppure un PC con Windows, sapere come installare GPU Nvidia Tesla è il primo passo per sfruttare al meglio le sue capacità.
Pronto a installare una GPU Nvidia Tesla su Windows? Segui la nostra guida completa!
In questa guida passo passo, ti mostreremo come effettuare l'Installazione Nvidia Tesla e la successiva Configurazione Nvidia Tesla su un sistema Windows. Dalla scelta dell'hardware alla configurazione finale tramite software, esploreremo ogni dettaglio, rendendo questo Nvidia Tesla Setup accessibile anche a chi non è esperto. Seguendo questa Guida Nvidia Tesla, potrai avere un sistema perfettamente funzionante e ottimizzato.
Perché installare una Tesla su Windows?

Come accennato, Linux è la piattaforma preferita per la maggior parte dei carichi di lavoro HPC/AI che utilizzano le GPU Tesla. Tuttavia, potresti voler Installare GPU Nvidia Tesla su Windows per diversi motivi: Compatibilità Software: Alcuni software professionali o framework di sviluppo specifici potrebbero funzionare esclusivamente o in modo ottimale su Windows. Ambiente di Sviluppo Integrato: Se il tuo flusso di lavoro principale e il tuo ambiente di sviluppo sono basati su Windows, mantenere l'intera infrastruttura sulla stessa piattaforma può semplificare la gestione. Testing e Validazione: Potrebbe essere necessario testare applicazioni o modelli specifici nell'ambiente Windows prima di implementarli su larga scala su server Linux. Sistemi Esistenti: Potresti avere un potente workstation un server Windows o semplicemente un PC Desktop su cui desideri aggiungere capacità di calcolo Tesla senza migrare l'intero sistema operativo. Indipendentemente dal motivo, Installare GPU Nvidia Tesla su Windows richiede attenzione ai dettagli, specialmente per quanto riguarda i driver e i requisiti hardware.
Preparazione del Sistema e installazione fisica

Prima di inserire fisicamente la tua preziosa GPU Tesla nel computer, è fondamentale dedicare del tempo alla preparazione del sistema e alla verifica dei requisiti. Saltare questi passaggi può portare a incompatibilità, instabilità del sistema o, nel peggiore dei casi, danni all'hardware. Una corretta preparazione è la chiave per una installare Nvidia Tesla senza intoppi. Sezione 1.1: Requisiti di Sistema e Compatibilità Le schede Tesla sono diverse dalle schede grafiche consumer come le GeForce. Sono progettate per il calcolo intensivo e hanno requisiti specifici. Alimentatore (PSU) Questo è forse il requisito più critico. Le GPU Tesla consumano molta energia, spesso significativamente più di una GeForce di fascia alta. Verifica le specifiche di potenza della tua specifica scheda Tesla (es. Tesla P100, V100, A100, K80, K100 etc.). Avrai bisogno di un alimentatore con una potenza totale sufficiente (spesso 850W, 1000W o anche di più per modelli di fascia alta) e, soprattutto, con i connettori di alimentazione PCIe ausiliari necessari (es. 6-pin, 8-pin, o anche connettori EPS a 8-pin specifici per GPU, a seconda del modello). Assicurati che il tuo PSU abbia abbastanza connettori e che siano adeguatamente distribuiti sui cavi. Un PSU insufficiente o con cavi non adeguati può causare instabilità, throttling o impedire l'avvio del sistema. Scheda madre La tua scheda madre deve avere uno slot PCI Express (PCIe) disponibile. Le schede Tesla richiedono tipicamente uno slot PCIe x16 versione 3.0 (anche se a volte possono funzionare in slot x8 con prestazioni ridotte, se la scheda lo supporta esplicitamente). Assicurati che lo slot sia libero e che ci sia spazio fisico sufficiente intorno ad esso. Verifica anche che il BIOS/UEFI della scheda madre sia aggiornato alla versione più recente per garantire la massima compatibilità hardware. Case del computer Le schede Tesla sono spesso a doppio slot o addirittura a triplo slot in termini di spessore e possono essere piuttosto lunghe. Verifica che il tuo case offra spazio fisico sufficiente per ospitare la scheda senza ostruzioni. Molte Tesla sono progettate per ambienti server con un flusso d'aria ottimizzato; se le installi in un case desktop standard, assicurati che ci sia una ventilazione adeguata, in quanto tendono a scaldarsi molto sotto carico. CPU e RAM: Anche se la Tesla gestirà i calcoli principali, un processore e una quantità di RAM adeguati sono necessari per gestire il sistema operativo e alimentare i dati alla GPU in modo efficiente. I requisiti specifici dipendono dal tipo di carico di lavoro, ma un processore moderno e almeno 16 GB di RAM sono solitamente un buon punto di partenza. Sistema Operativo Windows: Hai bisogno di una versione supportata di Windows. Le schede Tesla sono generalmente supportate su Windows 10 e 11 Pro/Enterprise/Workstation o Windows Server (2016, 2019, 2022). Verifica la documentazione ufficiale di Nvidia per il tuo specifico modello di Tesla per confermare la compatibilità con la tua versione di Windows. È fortemente raccomandato che Windows sia completamente aggiornato prima di procedere. Verificare attentamente questi requisiti prima di procedere con l'Installazione Nvidia Tesla ti risparmierà un sacco di potenziale frustrazione. Sezione 1.2: Preparazione Software del Sistema Una volta che hai verificato la compatibilità hardware, è tempo di preparare il tuo sistema operativo per ricevere la nuova GPU. Backup (Opzionale ma Consigliato): Sebbene l'installazione di hardware sia generalmente sicura, è sempre una buona pratica creare un backup dei dati importanti prima di apportare modifiche significative al sistema. Aggiornamenti di Windows: Assicurati che il tuo sistema operativo Windows sia completamente aggiornato tramite Windows Update. Questo garantisce che tu disponga delle patch di sicurezza più recenti e del supporto hardware generale più aggiornato. Disinstallazione dei Driver GPU Esistenti: Questo è un passaggio CRITICO. Se hai un'altra GPU installata (sia Nvidia, AMD o Intel integrata) e stai installando la Tesla come GPU di calcolo aggiuntiva o come unica GPU (anche se molte Tesla non hanno uscite video), è essenziale rimuovere completamente i driver grafici preesistenti. L'uso di driver multipli o incompatibili è una delle cause più comuni di problemi dopo l'installazione di una nuova scheda. Il modo migliore per farlo è utilizzare Display Driver Uninstaller (DDU), un'utility gratuita di terze parti ampiamente raccomandata dalla comunità hardware. Scarica DDU, avvia Windows in Modalità Provvisoria (Safe Mode). Esegui DDU e seleziona "Clean and restart" (Rimuovi e riavvia) per i driver del tuo produttore GPU precedente. Questo rimuoverà in profondità tutti i file e le chiavi di registro associate ai vecchi driver. Una volta riavviato il sistema (tornerà in modalità normale con un driver grafico di base Microsoft), sei pronto per l'installazione fisica. Sezione 1.3: Installazione fisica della GPU Tesla

Ora arriviamo al momento di inserire la scheda Tesla nel tuo sistema. Esegui questi passaggi con cura e attenzione. Spegnimento Completo: Spegni completamente il tuo computer e scollegalo dalla presa di corrente. Premi il pulsante di accensione del computer per scaricare l'eventuale elettricità residua. Apertura del Case: Rimuovi il pannello laterale del tuo case per accedere all'interno. Misure Antistatiche: Per proteggere i componenti dall'elettricità statica, indossa un braccialetto antistatico collegato a una parte metallica non verniciata del case del computer, oppure tocca regolarmente una superficie metallica messa a terra. Individua lo Slot PCIe: Identifica lo slot PCIe x16 (solitamente il più lungo sulla scheda madre) dove intendi installare la scheda Tesla. Se hai più slot x16, consulta il manuale della scheda madre per capire quale configurazione offre la massima banda (spesso il primo o il superiore). Rimuovi le staffe posteriori del case che corrispondono agli slot che verranno occupati dalla scheda (spesso due o tre). Inserimento della Scheda: Estrai con attenzione la scheda Tesla dalla sua confezione. Afferrala per i bordi, evitando di toccare i contatti dorati dello slot o i componenti sul PCB. Allinea i contatti della scheda con lo slot PCIe sulla scheda madre. Esercita una pressione uniforme sui bordi superiori della scheda finché non senti o vedi che si è inserita completamente nello slot. Potrebbe esserci un piccolo "clic" o la chiusura di una levetta sullo slot stesso. Collegamento dell'Alimentazione: Questo è un altro passaggio critico per completare l'attività di Installare GPU Nvidia Tesla. Le schede Tesla richiedono alimentazione ausiliaria tramite i connettori PCIe sulla parte superiore o laterale della scheda. Collega saldamente tutti i cavi di alimentazione necessari dal tuo alimentatore ai connettori corrispondenti sulla scheda Tesla. Assicurati che i connettori siano inseriti fino in fondo. Non collegare l'alimentazione è un errore comune che impedisce alla scheda di funzionare. Fissaggio della Scheda: Fissa la scheda al case del computer utilizzando le viti appropriate attraverso le staffe posteriori rimosse in precedenza. Questo previene che la scheda si pieghi o si disconnetta. Richiusura del Case: Una volta che la scheda è saldamente installata e alimentata, puoi richiudere il pannello laterale del case. Hai completato la fase fisica. Ora è il momento di affrontare la parte software per finire di Installare GPU Nvidia Tesla.
Installazione del Software e configurazione
Con la GPU Tesla installata fisicamente nel tuo sistema, il passo successivo è installare i driver corretti e configurare il sistema operativo per riconoscerla e utilizzarla. Questo passaggio è cruciale per poter effettivamente utilizzare la scheda per il calcolo accelerato. Una corretta Configurazione Nvidia Tesla è vitale per sbloccare il pieno potenziale della tua GPU. Sezione 2.1: Avvio del Sistema e installazione dei Driver Tesla Dopo aver installato fisicamente la GPU, riaccendi il computer. Windows dovrebbe avviarsi e potrebbe rilevare nuovo hardware, installando un driver grafico di base (come "Microsoft Basic Display Adapter"). Questo è normale. La priorità ora è scaricare e installare i driver Nvidia corretti per la tua scheda Tesla. Scaricare i Driver Corretti: NON utilizzare i driver GeForce standard scaricabili tramite GeForce Experience o la sezione driver "Gaming" del sito Nvidia. Le schede Tesla richiedono driver specifici della serie "Nvidia RTX Enterprise Production Branch" o "Data Center Driver". Vai sul sito web ufficiale di supporto driver di Nvidia (https://www.nvidia.com/Download/index.aspx).

Nella sezione "Manual Drivers Search ", seleziona i seguenti parametri: Select Product Category: Cerca una categoria come "Tesla", "Data Center / HPC", o "RTX / Quadro" (a seconda del modello e dell'anno di produzione della tua scheda Tesla). A partire da modelli recenti come le serie A e H, potrebbero rientrare nella categoria "Data Center / HPC". Select Product Series: Seleziona la serie corretta per la tua scheda (es. "Tesla V100 Series", "A100 Series, K80 ecc..."). Product: Scegli il modello esatto della tua scheda (es. "Tesla V100", "A100 80GB PCIe, K50, ecc..."). Operating System: Seleziona la tua versione di Windows (es. "Windows 10 64-bit", "Windows Server 2019 64-bit"). Download Type: Scegli "Production Branch" o "Data Center Driver". Evita le versioni "New Feature Branch" a meno che tu non abbia una necessità specifica per le funzionalità più recenti e non ti preoccupi della stabilità. La "Production Branch" è generalmente la più stabile. Language: Seleziona la tua lingua preferita. Fai clic su "Search o Find" (Cerca). Troverai l'ultimo driver compatibile. Scarica il file eseguibile. Eseguire l'Installer del Driver: Individua il file che hai scaricato ed eseguilo come amministratore. L'installer ti chiederà di accettare i termini della licenza. Potresti avere l'opzione tra un'installazione "Express" e "Custom" (Personalizzata). Per la migliore pulizia e stabilità, specialmente dopo aver usato DDU, scegli "Custom". Nella schermata "Custom Install Options", assicurati che siano selezionati il driver grafico e i componenti necessari come CUDA (Compute Unified Device Architecture). È altamente raccomandato selezionare l'opzione "Perform a clean installation" (Esegui un'installazione pulita). Anche se hai usato DDU, questo passaggio assicura che nessun file di driver Nvidia precedente interferisca. Procedi con l'installazione. Lo schermo potrebbe diventare nero o lampeggiare più volte durante il processo; è normale. Al termine dell'installazione, l'installer ti chiederà di riavviare il computer. Fallo immediatamente. Il riavvio è essenziale per finalizzare l'installazione dei driver. A questo punto, hai completato la fase software per Installare GPU Nvidia Tesla. Il tuo sistema Windows dovrebbe ora riconoscere e poter interagire con la GPU. Sezione 2.2: Verifica e Configurazione Iniziale Dopo il riavvio, è importante verificare che i driver siano stati installati correttamente e che il sistema riconosca la tua GPU Tesla. Questa fase è fondamentale per la Configurazione Nvidia Tesla e per assicurarsi che tutto funzioni come previsto. Gestione Dispositivi (Device Manager): Apri la Gestione Dispositivi su Windows (cerca "Gestione Dispositivi" nel menu Start). Espandi la sezione "Schede video". Dovresti vedere elencata la tua GPU Nvidia Tesla senza alcun punto esclamativo giallo o indicazione di errore. Se la vedi, significa che Windows l'ha riconosciuta e i driver di base sono caricati. Nvidia Control Panel: Potrebbe esserci (o meno) un Nvidia Control Panel installato con i driver Tesla. Se presente, aprilo. Le opzioni saranno probabilmente limitate rispetto al Control Panel per le schede GeForce, focalizzate maggiormente su impostazioni di calcolo piuttosto che grafiche. La sua presenza e funzionalità confermano ulteriormente l'installazione dei driver. Utilizzo di nvidia-smi: Questo è lo strumento a riga di comando più importante per interagire con le GPU Tesla e verificare la loro operatività. Apri il Prompt dei Comandi (CMD) o PowerShell. Digita nvidia-smi e premi Invio sulla tastiera. Se l'installazione è andata a buon fine, vedrai una tabella con informazioni sulla tua GPU Tesla: il modello, la versione del driver, la versione CUDA supportata, l'utilizzo della memoria, l'utilizzo della GPU e la temperatura. Questo comando è la prova definitiva che la tua GPU Tesla è stata riconosciuta correttamente dal sistema e che i driver sono operativi. Puoi usare nvidia-smi anche in futuro per monitorare lo stato della GPU durante i carichi di lavoro. Installazione di CUDA Toolkit e cuDNN (Se Necessario): La maggior parte delle applicazioni di calcolo ad alte prestazioni che utilizzano le GPU Tesla (come framework AI/ML, software scientifici) richiede l'installazione del NVIDIA CUDA Toolkit e, spesso, della libreria cuDNN (CUDA Deep Neural Network library). Il CUDA Toolkit fornisce l'ambiente di sviluppo per programmare sulla GPU. Scaricalo dal sito web degli sviluppatori Nvidia. Assicurati di scaricare la versione del Toolkit compatibile con la versione del driver Tesla che hai installato (la tabella di nvidia-smi mostra la versione CUDA supportata dal driver). cuDNN è una libreria ottimizzata per le operazioni fondamentali delle reti neurali profonde. Anche questa deve essere scaricata separatamente dal sito degli sviluppatori Nvidia (richiede la registrazione al programma Nvidia Developer). Devi scaricare la versione di cuDNN compatibile sia con la tua versione di CUDA Toolkit che con il framework AI/ML che intendi utilizzare (es. TensorFlow, PyTorch). L'installazione di CUDA Toolkit e cuDNN implica l'esecuzione dei rispettivi installer e, a volte, la copia manuale di file in directory specifiche. Segui attentamente le istruzioni di installazione fornite da Nvidia per questi componenti. L'installazione di questi pacchetti è una parte essenziale della Configurazione Nvidia Tesla per molti casi d'uso. Testing con Applicazioni: Per confermare che la tua GPU Tesla sia effettivamente utilizzata per il calcolo, prova a eseguire un'applicazione che sfrutta la GPU. Se hai installato il CUDA Toolkit, puoi provare a compilare ed eseguire uno degli esempi forniti per verificare la funzionalità CUDA. Se stai usando un framework AI/ML, esegui un piccolo modello per vedere se la GPU viene rilevata e utilizzata. Read the full article
0 notes
Text
#PS BigBig#Original Content#Spirituality#Practical Solutions#Global Harmony#Life-Changing Teachings#Universal Truths#OneStarDao#5th Dimension#Collective Ascension#Divine Potential#Awareness#Clarity#Evolution#Inspiration#Human Consciousness#Ascension Journey#Telegram#Personal Growth#Transformation#Future Creation#Lightwork.
0 notes
Text
Blog 6
Quantum Computing: Current Trends and Future Potential
Quantum computing is revolutionizing the way we process information by leveraging the principles of quantum mechanics. Unlike classical computers that use bits (0s and 1s), quantum computers use qubits, which can exist in multiple states simultaneously thanks to superposition and entanglement. This allows them to solve complex problems exponentially faster than traditional systems.
Current Trends in Quantum Computing
1. Advancements in Qubit Technology
Researchers are exploring different qubit implementations, including:
Superconducting qubits (used by IBM and Google)
Trapped ions (pioneered by IonQ and Honeywell)
Photonic qubits (being developed by Xanadu and PsiQuantum)
Silicon spin qubits (pursued by Intel and startups like Silicon Quantum Computing)
Each approach has trade-offs in terms of stability, scalability, and error rates.
2. Quantum Error Correction (QEC)
Qubits are highly sensitive to environmental noise, leading to errors. Companies like Google and IBM are making strides in error-corrected quantum computing, using techniques like surface codes to improve reliability.
3. Hybrid Quantum-Classical Systems
Since fully fault-tolerant quantum computers are still years away, hybrid algorithms (combining classical and quantum processing) are gaining traction. Companies like NVIDIA and Amazon Braket are integrating quantum processing with classical high-performance computing (HPC).
4. Quantum Cloud Platforms
Major tech players are offering cloud-based quantum computing access:
IBM Quantum (IBM Q System One)
Google Quantum AI
Microsoft Azure Quantum
Amazon Braket
Rigetti’s Quantum Cloud Services
This allows researchers and businesses to experiment with quantum algorithms without owning hardware.
5. Industry-Specific Applications
Quantum computing is being tested in fields like:
Cryptography (post-quantum encryption to counter Shor’s algorithm threats)
Drug Discovery (molecular simulations for new medicines)
Finance (optimizing portfolios and risk analysis)
Logistics (solving complex optimization problems)
Challenges Ahead
Despite progress, key hurdles remain:
Qubit decoherence (maintaining quantum states long enough for computation)
Scalability (building large, stable quantum processors)
Cost and accessibility (making quantum computing practical for businesses)
The Future of Quantum Computing
While we’re still in the Noisy Intermediate-Scale Quantum (NISQ) era, breakthroughs in error correction, qubit stability, and algorithm development are accelerating. Experts predict that within the next decade, we may see fault-tolerant quantum computers capable of solving problems beyond classical reach.
Quantum computing is no longer just a theoretical concept—it’s an emerging reality with transformative potential. Stay tuned as this exciting field continues to evolve!
0 notes